Build a dust burst with a ParticleEmitter inside an Attachment on a Part. Use a transparent dust texture, a short lifetime, and a small manual burst. Start with one fixed test location before attaching the effect to footsteps, landings, or moving objects.
Build a visible test location
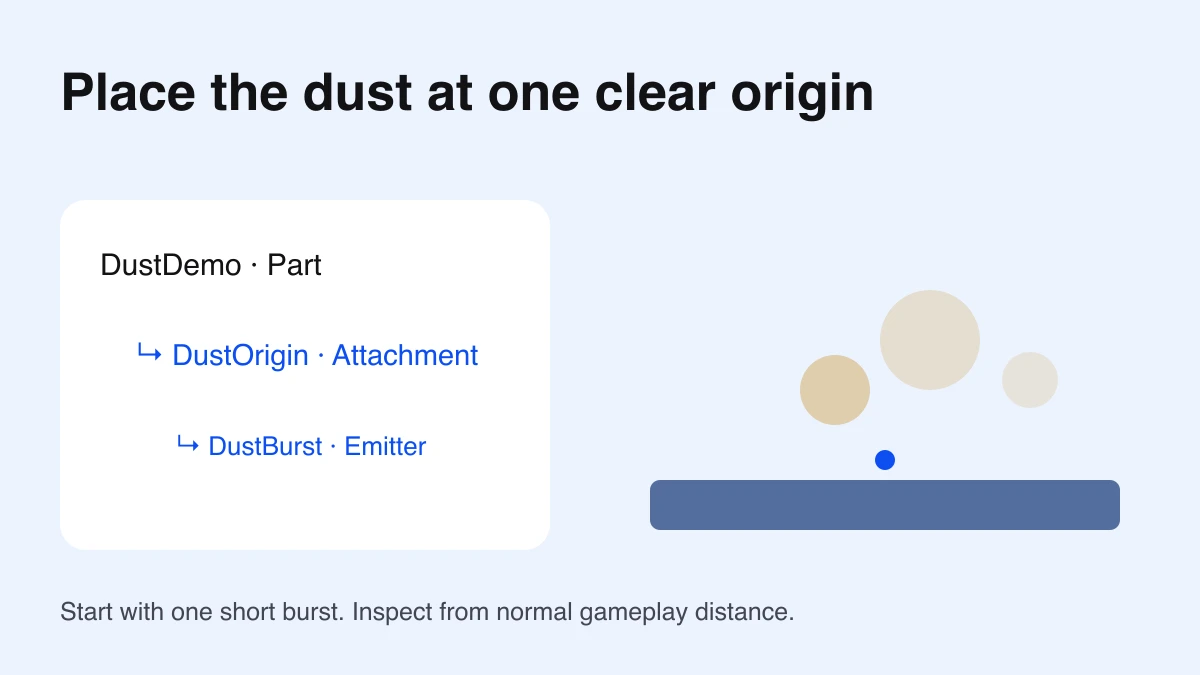
Create an anchored Part named DustDemo near the spawn and insert an Attachment named DustOrigin. Put a ParticleEmitter named DustBurst inside that Attachment. Place the origin where you want the burst to start, just above the surface for this exercise.
The ParticleEmitter reference distinguishes a Part’s emission volume from an Attachment’s emission point. Use the Attachment when you need a recognizable origin. Rotate it deliberately if the emission direction is wrong.
Use a texture with a transparent background
Assign an image you own or have permission to use as the emitter’s Texture. A soft, pale dust shape is a useful starting design. Check the exported image itself: a checkerboard drawn into the artwork will appear in the particle, while an actual transparent background allows the scene to show through.
Keep the texture simple for your first test. You should be able to recognize a single particle before adding more. Use the image import guide for asset preparation, then confirm the correct image reference is assigned to the emitter.
Set a small starting recipe
| Property | Start with | Check |
|---|---|---|
| Enabled / Rate | False / 0 | Manual burst only |
| Lifetime | 0.4 to 0.8 seconds | Cue ends promptly |
| Speed | 1 to 3 | Small outward movement |
| SpreadAngle | 30, 30 | Compact spread |
| Color | Muted tan | Fits the floor and lighting |
| Size / Transparency | Small start, gentle expansion, fade to invisible | Soft ending rather than a sudden disappearance |
Lifetime and Speed use ranges; Size and Transparency can vary across particle age. Configure their editors in Properties. Try one change at a time and compare from the same camera position.
Trigger the burst with a test prompt
Add a ProximityPrompt directly beneath DustDemo. Put a regular Script beneath the same Part, then use this exercise code. Confirm the names in Explorer match. The prompt gives you a repeatable test trigger before you connect real gameplay.
local part = script.Parent
local prompt = part:WaitForChild("ProximityPrompt")
local origin = part:WaitForChild("DustOrigin")
local emitter = origin:WaitForChild("DustBurst")
local lastBurst = -math.huge

emitter.Enabled = false
emitter.Rate = 0
prompt.Triggered:Connect(function()
    local now = os.clock()
    if now - lastBurst < 1 then return end
    lastBurst = now
    emitter:Emit(12)
end)
Emit produces the requested burst even when continuous emission is disabled. The one-second gate is shared for this test object and prevents overlapping bursts from repeated prompt activations. This is a visual test, not a player reward or damage system.
Check the official burst-effect tutorial for another practical action-effect workflow.
Check the effect in three views
- Stand close enough to inspect the texture and origin.
- Move to normal gameplay distance and trigger again.
- View it against both a light and a dark surface.
Look for a readable cue that ends quickly. If the dust fills the whole screen, reduce size or count before adding more effects. If it disappears against the background, compare its color and transparency in that scene’s lighting.
Keep repeated effects affordable
Test several activations, then repeat on your intended devices and lower rendering quality. Shorter lifetimes and fewer simultaneous particles are useful starting levers, but measure the actual scene. Texture coverage and overlapping transparent effects can matter even when a particle count seems small.
Use the lighting comparison guide to keep the scene readable. Capture a fixed view with creator freecam, then return to the player camera to test the effect during movement.
Diagnose a missing burst
- No visible particle: check Texture, Lifetime, Transparency, and the emitter’s parent.
- Wrong location: inspect DustOrigin’s position and orientation.
- Prompt does nothing: inspect the Script path and Output messages.
- Particles continue afterward: confirm Enabled is false and Rate is zero.
- Squares around the dust: inspect the source image’s alpha background.
Disabling continuous emission does not remove particles already alive. Let the short burst expire, or use Clear when you deliberately need to remove existing particles. Record the setting and observed result before making another change. Documentation checked October 7, 2026.