Import the image into Roblox Studio, then choose the object that displays it. Use a Decal for one picture on a Part, a Texture for a repeating surface pattern, or an ImageLabel for a picture inside UI. Importing the asset and placing it in the scene are separate steps.
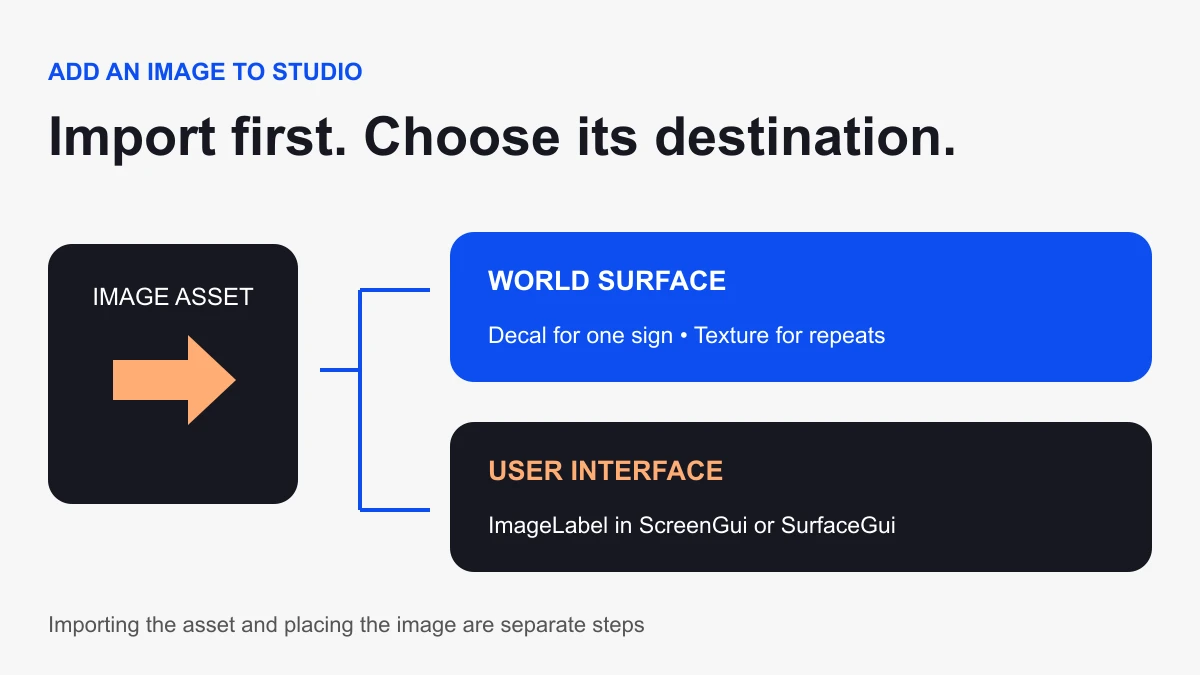
Choose the destination before importing
| Goal | Object | Next guide |
|---|---|---|
| One wall sign | Decal beneath a Part | Decal placement |
| Repeating floor | Texture beneath a Part | Tile size and seams |
| On-screen icon | ImageLabel in ScreenGui | Screen-image exercise below |
| UI panel on an object | ImageLabel in SurfaceGui | Part-face labels below |
Start with one destination and one known image. Trying several object types at once makes it harder to distinguish an import problem from a placement problem.
Import the image asset
- In Studio’s File menu, select Import.
- Choose the image file.
- Review the import settings and any warnings.
- Complete the import and record the uploaded asset ID.
The Importer reference lists supported image formats and the current workflow. Use a clear filename so you can distinguish revisions. Keep the editable source separately from the uploaded image.
Use artwork you own or have permission to use. A successful import is not a substitute for checking the asset’s availability in the intended experience.
Place a simple image on the player’s screen
- In Explorer, insert a ScreenGui beneath StarterGui.
- Insert an ImageLabel beneath that ScreenGui.
- Give the label an easily visible test size and position.
- Set its Image property to the imported asset reference.
- Set BackgroundTransparency to 1 if you want only the image visible.
- Start a play test and inspect the result.
The ImageLabel reference documents Image, ImageContent, ImageTransparency, tint, and scaling. ImageLabel displays a non-interactive image; choose ImageButton when the image needs button behavior.
For the first check, use an image with a distinctive shape and one clear color. Keep the test label large enough to find. After it displays correctly, reduce it to the intended size and inspect it on the smallest supported screen.
Preserve the shape of the artwork
A square icon and a wide banner need different display rectangles. If the image looks stretched, compare the image’s proportions with the label’s dimensions and inspect ScaleType. Pick whether you want the entire image visible or a deliberate crop; do not change the source file repeatedly to compensate for the wrong UI layout.
Check the surrounding spacing and background contrast. A transparent icon can disappear against part of the scene even when it loaded correctly. Give the player a readable visual context.
Put UI on a Part’s face
For a panel containing an image and other UI elements, insert a SurfaceGui on the Part, then an ImageLabel beneath that container. Confirm the selected Face. The official label guide describes screen and part-face placement.
Choose this when you need a composed UI panel. For one simple sign image, a Decal can be the more direct setup. Interactive world UI also has input and hierarchy requirements beyond displaying a picture; test those separately when adding buttons.
Debug a missing or wrong image
- Wrong picture: verify the asset reference and revision you selected.
- Blank rectangle: check the image reference, visibility and transparency.
- Image off-screen: inspect label size, position, and parent container.
- Image on the wrong side: inspect the Part-face selection.
- Unexpected color: inspect tint rather than immediately re-exporting the art.
- Editor looks right, game differs: inspect the runtime UI hierarchy and any scripts that replace the image.
Record the object path and asset reference before changing another setting. Use Find All to locate competing assignments. For more layout work, continue with the GUI tutorial. Sources checked October 6, 2026.