To add a repeating image to a Roblox baseplate, insert a Texture beneath the baseplate Part, choose its Top face, and apply the image through ColorMapContent. Set StudsPerTileU and StudsPerTileV to control each repeat’s size. Choose a Texture for repeating floor art; a Decal stretches one image across the surface.
Set up one plain surface first
Start with an anchored rectangular Part in a practice place. Apply one known image and inspect it from above. Roblox’s textures and decals guide documents the object, face, and image-reference workflow.
Use your own art or an image whose reuse terms fit the project. A texture ID identifies a reference; it does not prove the image will load in your experience or that you can reuse it. Keep the source file with your project notes.
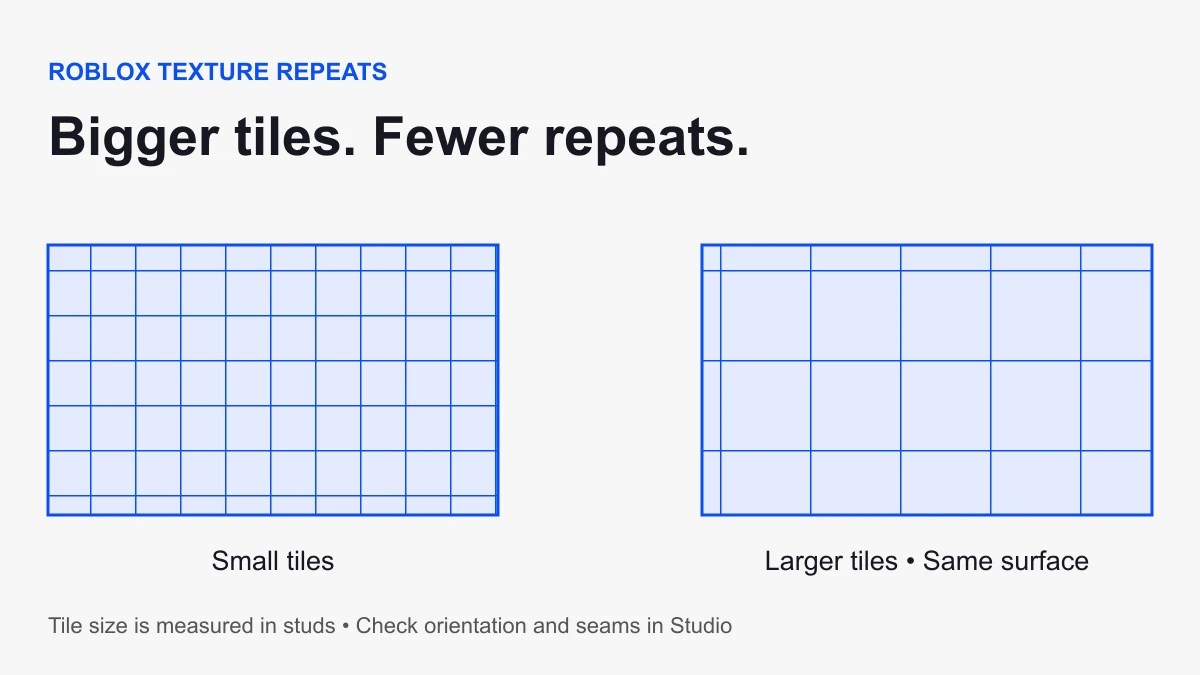
Tile size determines the repeat count
StudsPerTileU and StudsPerTileV describe the tile’s size in studs. Larger values make each tile bigger and reduce the number of repeats. Resizing the Part changes how many repeats fit; it does not make every tile stretch to fill the new surface. See the Texture API reference.
For a Top face, compare the two horizontal surface dimensions with the tile axes in your test scene. A 32-by-24-stud surface with four-stud square tiles fits eight by six complete repeats, or 48 tiles. That is a geometric estimate, not a rendering-performance benchmark.
If one dimension is 30 studs, four-stud tiles fit seven full repeats plus half a tile along that axis. A partial tile at an edge is expected; it is different from a visible seam inside the repeated artwork.
Use the texture tile calculator to compare dimensions, repeats, and partial edges before applying your values in Studio.
Use offsets for alignment
OffsetStudsU and OffsetStudsV shift the pattern in studs along its axes. Change one offset at a time when aligning a pattern across neighboring surfaces. Record tile sizes and offsets together so you can reproduce the setup.
For adjacent floor sections, compare both sides of the join from the same camera position. If the pattern jumps, verify surface orientation and tile size before adjusting offsets. Trying arbitrary offsets while the sizes differ makes the result difficult to reason about.
Test the source image’s edges
A repeating image should connect cleanly at its opposite edges when the design requires a seamless floor. Put four copies of the source beside each other in your art editor. A mismatch that appears there will not be solved by changing the baseplate’s dimensions.
For a first design, use a simple pattern with generous contrast and few fine details. Add one unique marker to a diagnostic copy when testing orientation. Remove that marker from the finished repeating asset unless you want it visible in every tile.
Readability matters at player distance
Inspect the floor from the normal gameplay camera, not only close up in the editor. A dense pattern can compete with checkpoint signs, characters, or small pickups. Check whether a player can distinguish the route without relying only on color.
Compare one larger tile size and one smaller tile size on the same surface. Keep the image and lighting unchanged for that comparison. Record which version makes the playable area easier to read before choosing it for the whole map.
Diagnose an unexpected result
- One stretched image: check whether you inserted a Decal instead of a Texture.
- No visible image: inspect Face, image loading, transparency, and tint.
- Too many repeats: increase the tile size and compare at player distance.
- Seams inside every repeat: inspect opposite edges of the source art.
- Pattern changes at a floor join: compare orientation, tile dimensions, and offsets on both Parts.
For non-repeating signs, follow our decal placement guide. For planning a small obstacle course around those surfaces, try the course planner. Verify the texture on the actual target devices before release. Sources checked October 6, 2026.