Create one image, then test it on one part
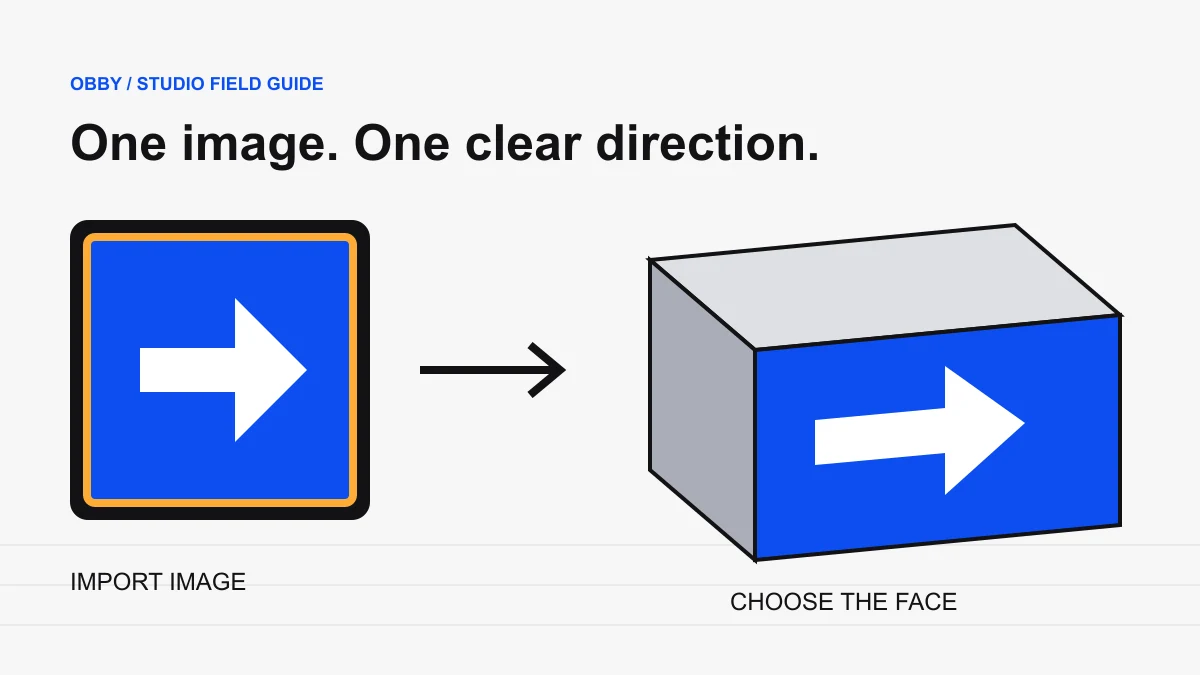
To create a Roblox decal, import your image into Studio, add a Decal beneath a part, choose its Face, and select the image through ColorMapContent. A decal stretches an image across one face; a Texture repeats it. Roblox’s textures and decals guide documents this workflow.
Start with one clearly labeled sign in an empty test place. Once it works, move it into your game. If you are planning the course around that sign, use the Obby course planner to sketch the geometry first.
Prepare an image that works as a game sign
Design for the distance at which a player will read it. A beautiful poster can make a poor direction sign if its arrow disappears from across the room. Use a simple silhouette, strong contrast, and generous empty space. Avoid making color the only way to distinguish two routes.
Try this original brief: a dark blue square with one broad white arrow and a small orange border. Put it beside a practice jump. Ask a tester which platform they think it points toward before explaining the course. Their answer tells you more than checking the image at full size in your editor.
Keep an editable source file and a separate exported image. Use names that describe purpose, such as checkpoint-arrow-v1. That makes later replacements easier to identify than a folder of files named final, final2, and final-new.
Apply the decal in Roblox Studio
- Import your image into Studio. Roblox assigns the imported asset an ID.
- In Explorer, insert a Decal as a child of the part you want to decorate.
- Choose the intended Face in Properties. Use the orientation indicator if you are unsure which side is front.
- Set ColorMapContent by selecting your uploaded image or entering its asset ID.
- Check the part from the player’s actual viewing position.
Images must follow Roblox’s rules and terms. Use artwork you have permission to upload. For full instructions, see the official import and placement guide.
Have a Creator Store URL? Extract its numeric asset ID without rounding its digits. The parser does not verify the asset or convert its type.
Image sideways? Use the current native Decal.Rotation workflow to turn the artwork without rotating the part.
Why old tutorials mention Texture
The current Decal API reference marks Texture and TextureContent as deprecated. Its examples assign a Content value to ColorMapContent. When adapting an older snippet, inspect the current property and value type instead of renaming a field and assuming it accepts the same data.
For a script-driven decal, first get the image working through Properties. Then make the smallest script change needed for your feature. This gives you a known working image and separates an asset problem from a code problem. Save a copy before editing a shared system.
Diagnose a white or missing decal
This is a suggested debugging order, not a guarantee that a particular error has one cause. Change one variable at a time and record the result.
| Check | Experiment | What to record |
|---|---|---|
| Object hierarchy | Inspect the Decal’s parent in Explorer. | Exact path of the part and decal. |
| Surface direction | Walk around the test part and inspect every side. | Face selected and viewing direction. |
| Image reference | Select your uploaded image directly in Properties. | The reference you selected and any error. |
| Visibility | Inspect Transparency and tint. | Values before and after your change. |
| Project differences | Try the same image on one plain part in a test place. | Whether the issue follows the image or the original setup. |
Do not “fix” a reference by subtracting a number from an asset ID. An ID identifies an asset; numerical proximity is not evidence that another ID is your image. Inspect the asset you actually uploaded and capture the exact Studio error if it still fails.
Choose a decal or a repeating texture
For a floor pattern, follow the baseplate texture guide and compare repeat sizes with the tile calculator.
A direction arrow needs to appear once. A tiled floor usually needs a repeating pattern. A decal stretches to its surface; a Texture tiles, with StudsPerTileU and StudsPerTileV controlling tile dimensions. See Roblox’s scaling reference.
Before adding decorative detail, test whether the sign helps the player finish a run. Remove it temporarily and compare where testers hesitate. If it adds clutter without clarifying the route, revise its position or simplify its design. Continue with the obby building tutorial and the publishing guide.
Workflow checked against Roblox Creator Hub on October 6, 2026. This guide describes Studio asset placement; Obby’s browser preview does not certify Roblox asset availability.