To make custom terrain textures in Roblox Studio, create a MaterialVariant from tileable texture maps, then select it when creating a paintable terrain material. The current workflow uses Expanded Terrain. For a single texture replacement across an existing base material, Material Manager also offers a global override.
Choose the scope before editing
| Your goal | Workflow | Check first |
|---|---|---|
| Turn an existing grass patch into sand | Terrain Paint or Replace | Existing source and intended target |
| Paint several custom looks in one place | Expanded Terrain custom materials | Material slot, tint, and optional variant |
| Replace one base material everywhere | Material Manager override | Other terrain and Parts using that base |
For the first task, follow the terrain material replacement guide. This tutorial focuses on making and testing the custom appearance itself.
Prepare one reusable texture set
Start with a surface you made or have permission to use. A tileable image should meet its opposite edges cleanly. Make a repeated preview in your image editor before uploading: a border that is barely visible once can become a grid across a hillside.
Give the files one shared name, such as Meadow_Color and Meadow_Normal. Keep a small record of which asset belongs in each field. A color image pasted into the wrong map field can produce a confusing result even when the upload succeeds.
For the first pass, use a simple surface with a recognizable scale. Avoid a highly directional pattern until you can tell whether its repetition, shading, and orientation fit the landscape.
Create a MaterialVariant in Material Manager
- Open Material Manager and select the intended base material.
- Choose Create Material Variant.
- Name the variant for its purpose, such as MeadowSurface.
- Add the matching texture assets in the map fields, such as Color and Normal. You can import files or enter asset IDs.
- Adjust Studs Per Tile and inspect the repeated scale.
Roblox stores these variants under MaterialService. Its custom materials documentation distinguishes reusable tileable MaterialVariants from SurfaceAppearance, which targets the UV layout of a particular mesh. Square texture maps are recommended; unspecified maps stay blank.
Keep this first variant small in scope. Record the name, base material, texture assets, and tile scale before creating another. If you later apply a variant to Parts and rename it, reapply the renamed variant to those Parts.
Enable Expanded Terrain and paint a custom material
Save a working copy first. Select Workspace in Explorer, set Expanded Terrain to Enabled, and follow the restart prompt. Reopen the place so the backend change takes effect. In Team Create, the current documentation instead requires exiting and waiting about 15 seconds before reopening.
- Open Terrain Editor and choose a brush such as Paint.
- Open the material picker beside Source Material and choose +.
- Give the terrain material a name and choose its base material.
- Select your MaterialVariant for the custom textures; adjust Color if needed.
- Paint a small test patch with the new material.
The custom terrain materials guide documents up to 62 custom paintable materials. A variant is optional when you only need a different tint. Current custom terrain slots do not respect a variant’s custom physical properties, so a visual change is not proof of changed friction.
Try a two-swatch practice layout
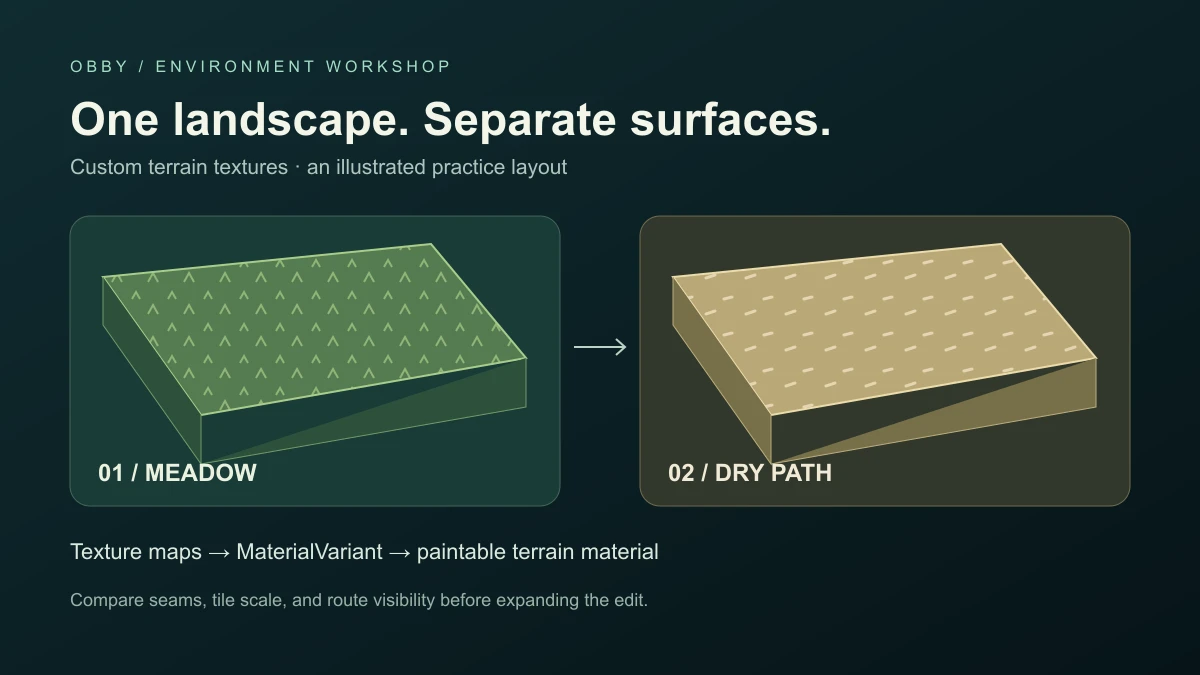
Make two adjacent patches in a spare test area. Call the first Meadow and the second Dry Path. Start with the same base material so you can compare the custom appearance without confusing it with a different terrain shape.
Apply your MeadowSurface variant to Meadow. Give Dry Path a contrasting tint or a second variant. Keep one untouched reference patch nearby. Photograph the same camera view after each change and record the tile scale next to the patch name.
Inspect the swatches from above, from a hillside angle, and at walking height. Look for obvious repeating borders, oversized details, and a path that blends into its surroundings. Then change just one setting and compare again. This is a proposed exercise; it has not been run in Studio for this guide.
| Swatch | Record | Acceptance question |
|---|---|---|
| Meadow | Variant, tint, tile scale | Does the surface repeat cleanly? |
| Dry Path | Variant or tint, tile scale | Can the route be followed at walking height? |
| Reference | Unchanged material | Can you identify what the edit changed? |
Use the texture tile calculator to reason about repeat size on a flat reference surface. Its Part-oriented tiling output is a planning aid; configure the terrain variant in Material Manager. Keep the lighting fixed while comparing, then use the lighting guide for a separate lighting pass.
Use a global override deliberately
If your goal is to replace an entire base material, select the variant in Material Manager and enable Set as Override. That scope includes Parts and terrain using the base material. Inspect a second, distant area before accepting the change.
For several independently painted looks, stay with the custom terrain materials workflow. A useful rule for your project notes is to write either “this swatch” or “every use of this base” before changing settings.
Diagnose the result before repainting
- The surface still looks like grass: confirm Expanded Terrain is enabled and the place was reopened.
- The texture repeats too visibly: inspect the source image’s edges and compare another tile scale.
- A setting changed several patches: inspect whether they share one terrain material. Editing a shared material updates its uses.
- The whole place changed: check whether a global override is enabled.
- The texture is correct but movement is unexpected: test gameplay independently; custom terrain slot physics have a documented limitation.
Once the surface is readable, continue with brush positioning or save the landscape comparison in the terrain seed planner. Documentation reviewed November 9, 2026.