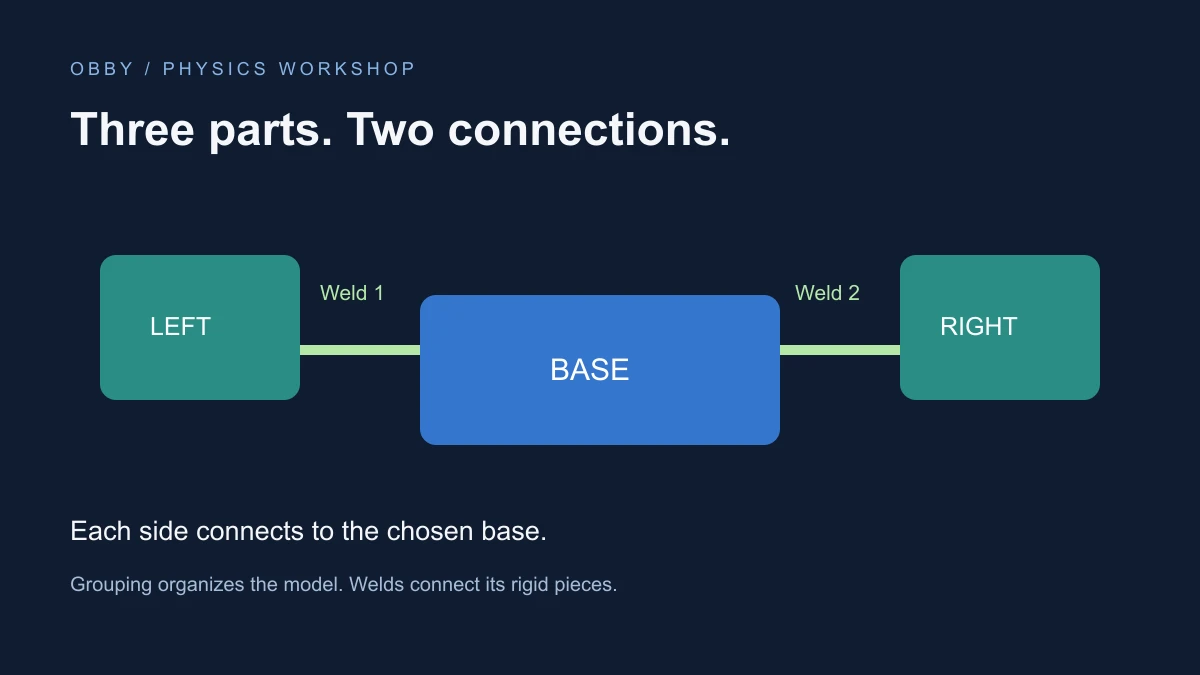
To weld multiple parts at once in Roblox, choose one BasePart and create a WeldConstraint from it to every other BasePart in the intended model. Set Part0 and Part1 for each connection. Grouping objects in a Model organizes them; the constraints provide the physical connections.
Start with a small model you can inspect
The exercise below creates three Parts and two welds in its own WeldPractice model. The chosen base connects directly to each side piece. It does not scan your whole Workspace or remove existing joints.
Use a spare place with a floor near the origin. Add a regular Script to ServerScriptService, paste the example, and start Play. Look around position 0, 8, 0. This proposed exercise is documentation-reviewed; it has not been executed in Studio for this guide.
-- Regular Script in ServerScriptService. Proposed exercise, not Studio-tested.
local model = Instance.new("Model")
model.Name = "WeldPractice"
model.Parent = workspace

local function makePart(name, size, position, color)
    local part = Instance.new("Part")
    part.Name = name
    part.Size = size
    part.Position = position
    part.Color = color
    part.Anchored = true -- Hold the layout while connecting it.
    part.Parent = model
    return part
end

local root = makePart("Base", Vector3.new(6, 1, 4),
    Vector3.new(0, 8, 0), Color3.fromRGB(70, 140, 240))
makePart("Left", Vector3.new(1, 2, 4),
    Vector3.new(-2.5, 9.5, 0), Color3.fromRGB(100, 210, 190))
makePart("Right", Vector3.new(1, 2, 4),
    Vector3.new(2.5, 9.5, 0), Color3.fromRGB(100, 210, 190))

local count = 0
for _, object in model:GetDescendants() do
    if object:IsA("BasePart") and object ~= root then
        local weld = Instance.new("WeldConstraint")
        weld.Part0 = root
        weld.Part1 = object
        weld.Parent = root
        count += 1
    end
end

-- Keep just the chosen base anchored for the first observation.
for _, object in model:GetDescendants() do
    if object:IsA("BasePart") then
        object.Anchored = object == root
    end
end
print("Created welds:", count) -- Expected: 2
print("One anchored base: inspect the connected layout")
task.wait(4)
root.Anchored = false
print("Base released: observe the parts falling together")
Check the two phases
During the initial four-second pause, the base stays anchored and holds the side pieces in place through their welds. After the base is released, expect the connected model to fall together. Your floor, other objects, and starting overlaps determine where it lands; the Script does not promise a particular final position.
Output should report two created welds. Inspect both constraints under Base: Part0 should reference Base, and Part1 should reference a different side piece. If the count is unexpected, check which objects are BaseParts rather than counting every descendant as a physical piece.
Adapt the loop to your own model
- Save a working copy and identify the exact Model you intend to connect.
- Choose an explicit BasePart as the connection hub.
- Inspect nested models and exclude doors, wheels, or pieces that should move independently.
- Connect each remaining intended BasePart to the hub.
- Choose the anchoring policy before testing movement.
The sample uses a freshly created model, so rerunning its connection loop on an existing asset is a separate decision. Do not repeatedly add constraints to an already connected model. Inspect existing joints first and retain deliberate movable joints. A bulk weld is appropriate for a rigid prop, not every mechanism.
Understand anchoring before diagnosing the weld
Roblox’s assembly documentation explains that one anchored part holds its connected assembly in place. Multiple anchored parts can split the assembly and deactivate welds between anchored assemblies. That is why the exercise releases the side pieces before observing the single anchored base.
The variable named root is our chosen connection hub. It does not explicitly assign the engine’s AssemblyRootPart. Roblox selects the assembly root using its own rules. Keep those two ideas distinct when adapting the example.
Keep the connection and layout checks separate
The WeldConstraint reference exposes Part0 and Part1 for the two connected BaseParts. Inspect those references before changing the object’s appearance or adding effects. A constraint object in Explorer is not by itself proof that the intended pair is connected.
Write down each expected pair before testing: Base → Left and Base → Right. Compare that record with Explorer. Then inspect whether the side pieces retain their arrangement when the base is released. A useful acceptance check is both the right connection graph and the intended motion.
Troubleshoot a model that stays still or separates
- The model never falls: inspect every intended piece for Anchored, including nested descendants.
- One piece falls away: check its Part0/Part1 references and whether it was included in the loop.
- A door stops opening: exclude it from the rigid set and review its existing mechanism.
- The result jumps or collides unexpectedly: inspect starting overlaps and the surrounding floor before adding more constraints.
- The model is only grouped: expand it and confirm the physical connections exist.
Continue with the collision settings guide when the connection is correct but contact behavior is confusing. For scripted placement, see the CFrame guide. Documentation reviewed November 17, 2026.
For a first held object, use the Tool setup tutorial to check Handle placement, equipping, and activation separately.