Roblox attributes attach named values to an Instance. Use GetAttribute to read one value, SetAttribute to create or change it, and a change signal when another part of your script needs to react. Begin with one clearly named attribute on one object before adding player state or several interacting systems.
Add an attribute in Studio or in a script
The Properties window guide shows the Attributes section at the bottom of the selected Instance’s properties. Add a name, choose a supported type, and edit its value. For a first Boolean example, use the exact name IsActive and a false default.
Choose a name that states the meaning of the value rather than its current appearance. IsActive describes state; GreenBlock describes a presentation choice that might change later. Keep spelling and capitalization consistent wherever you read or write the attribute.
The exercise below creates its own Part and attribute, so it does not depend on a manually named object already being in Workspace. This makes it easier to separate an attribute problem from a missing-object or incorrect-path problem.
Read and write with GetAttribute and SetAttribute
The Instance API reference lists GetAttribute, SetAttribute, GetAttributes, and GetAttributeChangedSignal. Read from the same Instance that receives the value. Two objects can have an attribute with the same name and still hold different values.
For example, a switch Model and its decorative Part are separate Instances. Setting IsActive on the Model does not mean a later call on the Part is reading that same entry. Keep a clear object reference beside the attribute name while debugging.
Try one observable state exercise
Insert a regular Script in ServerScriptService in a practice place. Open Output, then run the place. The script creates an anchored, non-collidable indicator, observes its attribute, and makes a short sequence of deliberate changes. Both the printed message and the color describe the state.
local indicator = Instance.new("Part")
indicator.Name = "AttributePractice"
indicator.Size = Vector3.new(4, 2, 4)
indicator.Position = Vector3.new(0, 4, 0)
indicator.Anchored = true
indicator.CanCollide = false
indicator:SetAttribute("IsActive", false)
indicator.Parent = workspace

local function renderState()
    local value = indicator:GetAttribute("IsActive")
    if value == true then
        indicator.Color = Color3.fromRGB(36, 168, 118)
        print("IsActive: true (active)")
    elseif value == false then
        indicator.Color = Color3.fromRGB(13, 78, 241)
        print("IsActive: false (inactive)")
    else
        indicator.Color = Color3.fromRGB(140, 140, 140)
        print("IsActive is missing or has an unexpected type:", value)
    end
end

local connection = indicator:GetAttributeChangedSignal("IsActive")
    :Connect(renderState)
renderState()

task.wait(2)
indicator:SetAttribute("IsActive", true)
task.wait(2)
indicator:SetAttribute("IsActive", false)
task.wait(2)
indicator:SetAttribute("IsActive", nil)
task.wait(2)
connection:Disconnect()
The intended sequence is inactive blue, active green, inactive blue, and then a gray missing-value display. Each scheduled change is separated by a task.wait call so you can inspect it. The waits are a teaching aid, not a precise animation clock. The example has been documentation-reviewed but has not been executed here inside Studio.
Stop and restart the practice test between runs. The script leaves its created Part in the running scene and disconnects the observer after the sequence. Do not expect further manual edits after that disconnection to update the color.
Keep false distinct from a missing value
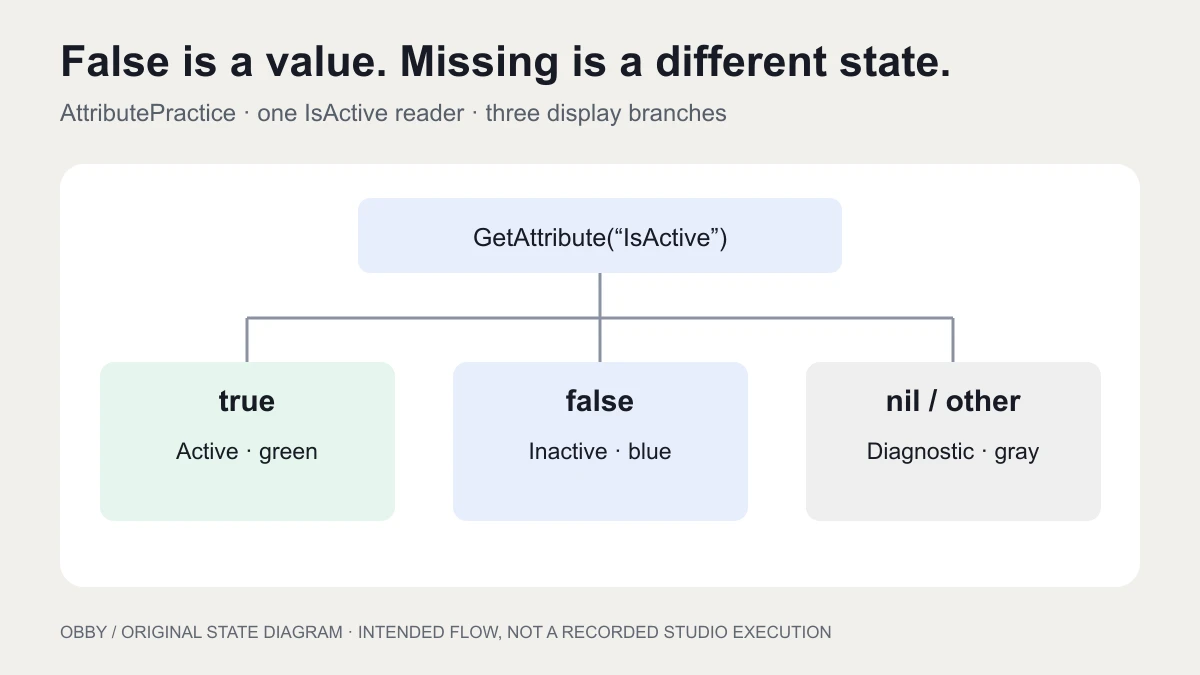
In this example, false is an intentional inactive state. A missing value means the attribute no longer exists on that Instance, or your read is targeting a different name or object. The renderer uses explicit comparisons so those cases have different messages.
A shortcut that replaces every false-like value with a true default can accidentally turn an explicit false into true. Decide what missing data should mean before writing a default. For a configuration field, it might mean “use a documented default”; for an incomplete setup, it might mean “show an error and stop.”
| Read value | Meaning here | Display |
|---|---|---|
| true | Explicit active state | Green and active message |
| false | Explicit inactive state | Blue and inactive message |
| nil or unexpected type | Missing or invalid configuration | Gray and diagnostic message |
Roblox’s properties and attributes guide documents deletion by setting an attribute to nil. Deleting the attribute is therefore different from assigning false. Check the Attributes section and Output together when testing that final transition.
Observe changes and perform an initial read
The same scripting guide documents that GetAttributeChangedSignal listens to one attribute and supplies no callback arguments. The renderer calls GetAttribute again to read the current value. Do not write the callback as if a new value will arrive in its first parameter.
The script also calls renderState once after subscribing. An observer handles later changes; a separate initial read establishes the display for the value that already exists. That pattern is useful when the presentation starts after another script has initialized the object.
If you need to inspect all entries during debugging, GetAttributes returns a dictionary. Keep that diagnostic separate from the state update path. A snapshot you read earlier is not a substitute for asking the Instance for its current value when the observer runs.
Separate runtime state from saved progress
Editor-authored attributes are stored with a saved place or asset, as described by the Properties window guide. That does not make arbitrary runtime changes into persistent player progress. Roblox’s data stores documentation covers data that must survive between sessions.
Decide who owns a value before adapting this exercise. A server-owned round state, a designer-authored setting, and a client’s temporary display preference have different lifetimes. This single-server exercise does not test cross-client delivery order, save player data, or validate a multiplayer action.
When a client needs an Instance from the server, account for object availability and initialization rather than assuming an immediate read is always ready. The scripting guide discusses replication order; test the actual server/client path in your own place before wiring a display to it.
Debug one reference and one value at a time
- Print the Instance’s full name and verify the object in Explorer.
- Compare the exact attribute name at its write and read sites.
- Inspect the type as well as the value.
- Perform an initial read instead of relying only on a future signal.
- Check whether the observer is still connected.
- Look for another script overwriting the same attribute.
For Boolean conditions, continue with the true and false guide. Use the Color3 picker to choose display colors, and the script search guide to locate competing writes. If a player interaction should change a state, start with a scoped proximity prompt exercise and define the permitted action separately from the attribute display. For grouping many Instances under one controller, continue with the CollectionService tags guide. Documentation checked November 8, 2026.