A Roblox ProximityPrompt gives a nearby player a clear action: open, inspect, talk, or activate. Start with the built-in prompt and a harmless shared object, then add your game’s permissions and presentation once the interaction works.
Create a tiny practice interaction
Add an anchored Part named PromptLamp to Workspace. Give it a size and position you can approach comfortably from the spawn area. Insert an Attachment beneath that Part and name it Interact. Put a ProximityPrompt beneath the Attachment, and put a regular Script directly beneath PromptLamp.
Workspace
  PromptLamp (Part, Anchored)
    Interact (Attachment)
      ProximityPrompt
    Script
Move the attachment to the place where you want the prompt to appear. Keep this first object away from walls and other prompts so you can test one interaction at a time.
Choose action text before polishing the UI
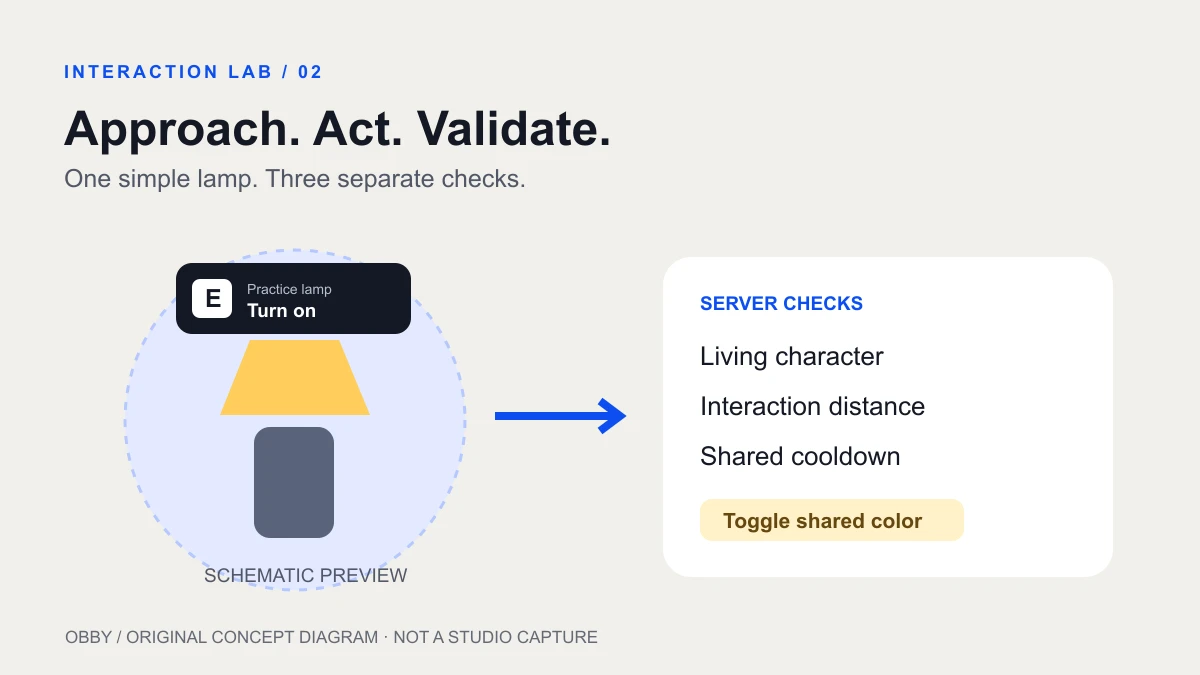
Use ObjectText to name the object and ActionText to name the action. “Practice lamp” and “Turn on” form a clear pair. Avoid text that merely repeats the interaction key; the built-in prompt handles input presentation.
Roblox’s proximity prompt guide covers keyboard, gamepad, and touch interaction. MaxActivationDistance controls the activation range. HoldDuration sets a hold interaction; zero gives an immediate action. RequiresLineOfSight affects whether the camera can see the prompt’s object.
Use a server Script for the shared change
Paste the following original practice script into PromptLamp’s Script. It toggles the Part’s color and updates the action label. All players share this lamp state. The one-second cooldown is also shared, so another player cannot immediately reverse a toggle.
local lamp = script.Parent
local origin = lamp:WaitForChild("Interact")
local prompt = origin:WaitForChild("ProximityPrompt")
local lastToggle = -math.huge
local isOn = false

prompt.ObjectText = "Practice lamp"
prompt.ActionText = "Turn on"
prompt.MaxActivationDistance = 10
prompt.HoldDuration = 0.5

prompt.Triggered:Connect(function(player)
    if not prompt.Enabled then return end
    local character = player.Character
    local root = character and character:FindFirstChild("HumanoidRootPart")
    local humanoid = character and character:FindFirstChildOfClass("Humanoid")
    if not root or not humanoid or humanoid.Health <= 0 then return end
    if (root.Position - origin.WorldPosition).Magnitude > 10 then return end
    if os.clock() - lastToggle < 1 then return end
    lastToggle = os.clock()

    isOn = not isOn
    lamp.Color = isOn and Color3.fromRGB(255, 214, 91)
        or Color3.fromRGB(70, 77, 92)
    prompt.ActionText = isOn and "Turn off" or "Turn on"
end)
This is a color-toggle exercise, not a currency reward, purchase, lock, or persistent inventory system. The ProximityPrompt API reference documents Triggered and its player argument. The script uses that player’s current character for the server checks.
Test the action, then test its boundaries
- Start a playtest and approach the practice lamp.
- Confirm the object and action labels describe the lamp.
- Complete the hold input and look for the color change.
- Confirm the label now offers the opposite action.
- Try again immediately, then after the shared cooldown.
- Walk outside the range and check that normal interaction is unavailable.
- Repeat using the device controls you intend to support.
Use a two-player test when the lamp is meant to be shared. Have one player toggle while the other observes. Agree on the expected result before testing: one world object, one visible state, and one shared cooldown. A per-player quest interaction would need different state ownership.
When a proximity prompt is not showing
| Symptom | First check |
|---|---|
| No prompt near the lamp | Correct parent hierarchy, Enabled, and approach distance |
| Prompt vanishes behind an object | Camera line of sight and attachment placement |
| One nearby prompt hides another | Exclusivity and shared input keys |
| Prompt appears but nothing changes | Script location, Output errors, and exact Interact name |
| Two players reverse the state too quickly | State ownership and server cooldown policy |
Change one setting per test. If disabling a visibility setting makes the prompt appear, you have identified a presentation issue; it does not establish that every resulting interaction should be accepted by the server.
When a permitted interaction needs a visual transition, use the TweenService guide to compare duration, easing, and cancellation behavior.
Keep presentation separate from authorization
Roblox’s client-server security guide warns that prompts can be abused like other client-triggered actions. Check the player’s eligibility and game state on the server. Range and a visible hold bar are not sufficient proof of permission.
The practice script checks a living character, distance from the attachment, prompt state, and a cooldown. If you adapt it to a keycard door, also verify ownership of the required key and the door’s current state. If interaction through a wall matters, add an appropriate server-side obstruction check. If completing a hold is part of a valuable game rule, validate timing on the server too.
Add custom presentation after the default version passes
Custom prompt UI is a separate layer. The engine reference includes a custom example using prompt visibility and input events. When you choose Custom style, you take responsibility for creating the interface; changing the style alone does not generate a branded widget.
Write a small design brief first: object name, verb, hold feedback, touch target, and what happens when the player walks away. Preserve the same server checks while changing the visual layer. The animation track guide offers a related prompt-triggered exercise when you want a visible character response.
For a game that also moves characters toward destinations, keep the interaction separate from pathfinding and route recovery. Reaching an object and being allowed to use it are different game rules.
The script was reviewed against the current documentation, but has not been executed here inside Roblox Studio. Use your practice place to verify it before integrating it into a live experience. Documentation checked November 8, 2026.