To upload meshes to Roblox, open Studio’s Importer, select your supported 3D file, inspect the preview, choose whether to upload the asset to Roblox, and complete the import. Check the resulting object in Workspace before building gameplay around it.
Start with a small file you can inspect
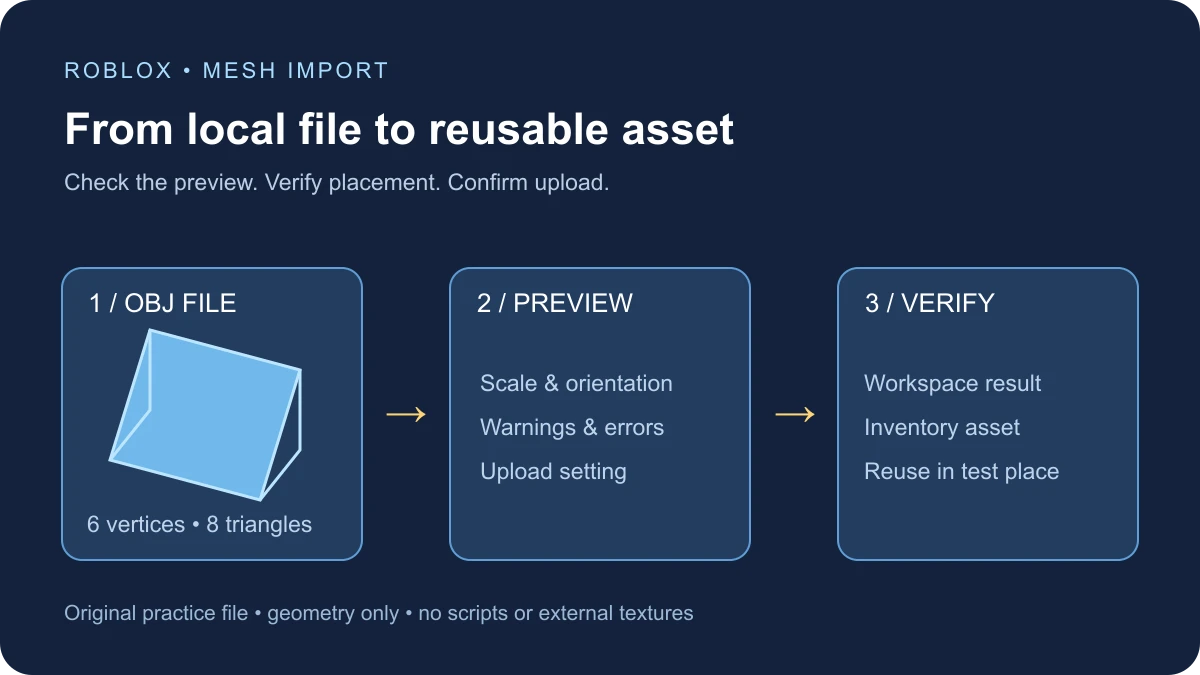
A first import is easier to debug when the file contains one simple object. Download our original practice wedge OBJ. It has six vertices and eight triangles, with coordinates spanning eight units in X, four in Y, and four in Z. It contains no textures, UVs, rig, animation, scripts, or external file references. We release this original file under CC0-1.0 so you can use, modify, and redistribute it freely.
The file’s geometry has been checked programmatically for valid indices, nonzero triangle areas, outward winding, and a closed surface. Its import into Studio has not been executed for this guide. The checks below describe what to verify in your own spare place; they are not a captured successful upload.
Choose a supported mesh format
Roblox’s Importer documentation lists OBJ, FBX, and glTF for meshes. OBJ is sufficient for this geometry-only exercise. Choose a richer supported export when your project needs a hierarchy, rigging, animation, or material data, and confirm those components in the preview.
Renaming a file extension does not convert its contents. Export the actual supported format from your modeling application. Keep a copy of the source project so you can correct the geometry and export again.
Import the practice wedge into Studio
- Open a spare place. From the Studio File menu, select Import.
- Select obby-mesh-import-practice.obj in the file browser.
- Inspect the 3D preview and selected object. Resolve any errors before continuing.
- Check the scale unit. For this exercise, interpret the coordinate units as studs and avoid adding a separate scale multiplier.
- Set the imported object to Anchored for the first placement check. That keeps gravity from confusing the test.
- If you want a reusable cloud asset, enable Upload to Roblox. Confirm the intended asset name and any destination choices shown in your session.
- Click Import, then inspect the result rather than assuming preview success proves everything is finished.
The documentation’s current entry point is File → Import. Studio interfaces evolve, so use the Importer control available in your installed version if its placement differs. Read the actual warning text instead of trying unrelated settings until the window closes.
Separate preview, Workspace placement, and cloud upload
The preview lets you examine the file before committing the import. Workspace placement lets you see the object in the current place. Uploading creates a reusable Roblox asset. Those are three different checks.
Roblox documents that the Upload to Roblox option adds the imported model to your Toolbox and Asset Manager inventory. After import, the Importer’s contextual actions can copy the asset ID or locate the object in Workspace. A copied Model ID is not automatically the same identifier as a child mesh dependency.
If you only need to inspect a local candidate first, review the upload setting before importing. Avoid creating repeated cloud copies every time you adjust one vertex. Keep a clear file name or version note so you know which revision you are testing.
Verify the imported object
| Check | Expected or intended result | If it differs |
|---|---|---|
| Shape | A solid wedge with one sloping surface | Compare orientation and face winding with the source file |
| Dimensions | 8 × 4 × 4 with source units treated as studs and no extra scaling | Inspect scale unit and import transforms |
| Appearance | Untextured geometry | No image or material file accompanies this OBJ |
| Placement | Visible, anchored object in the spare place | Locate it through the Importer and inspect its parent and transform |
| Reuse | Inventory asset if cloud upload was enabled and completed | Check upload status and the account or group destination |
Select the MeshPart inside any imported container before reading its Size. A Model and its children are different levels of the hierarchy. Compare dimensions before manually resizing the result, otherwise a successful correction can conceal the original unit mismatch.
MeshParts, Models, and editable geometry
The mesh overview explains the role of MeshPart objects for imported geometry. A Model can organize several instances; it is not itself a single triangle surface. The import options and file structure affect the resulting hierarchy, so inspect Explorer instead of relying on a particular child count.
If you want to change vertex positions through code after creation, follow the EditableMesh tutorial. Uploading a finished OBJ and constructing editable geometry at runtime solve different problems. If the whole object rotates around an unexpected point, inspect its imported pivot and the PivotOffset guide before changing every vertex.
Troubleshoot the first failed stage
- The file does not open: confirm the exporter wrote a supported format and that the file is not empty or merely renamed.
- The object is huge or tiny: compare source units, scale settings, and actual MeshPart dimensions before applying another multiplier.
- A surface disappears from one side: examine face orientation. Double-sided display can help diagnose visibility, but does not repair a hole or create thickness.
- The texture is missing: verify that your export actually included the needed material and texture data. The practice OBJ deliberately has none.
- The preview works but upload fails: preserve the error text and distinguish asset upload, account permissions, and processing from geometry parsing.
- The wedge is visible but walking feels wrong: inspect collision separately. Rendered triangles and the engine’s collision representation need their own validation.
Test reuse before building the final scene
For a reusable prop, import one clean version, locate the intended inventory asset, and try inserting it into a spare test place. Verify scale, orientation, anchoring, and appearance again. This tests the result you will actually reuse rather than only the first preview.
For a gameplay ramp, run a separate movement test with your character and collision configuration. For an avatar accessory or body, continue with Roblox’s dedicated avatar setup and specifications; an ordinary mesh import does not establish that the file is ready to sell or equip.
Once the small practice asset behaves as expected, repeat the same sequence with your own model. Change one variable at a time—geometry, materials, or rigging—so a failure has a clear starting point.
For shapes made from Studio Parts rather than imported files, use the union, color, and Separate guide.
Documentation reviewed November 17, 2026.
Before resizing imported geometry, check its source unit setting and measured dimensions. Use the Roblox meters-to-studs converter to compare lengths at the standard scale or your project’s chosen scale.