To make a union in Roblox Studio, select the parts you want to combine and choose Union from the Model tab’s solid-modeling tools. For a single-color result, inspect UsePartColor on the UnionOperation. To recover its component parts, use Separate rather than treating the union like a grouped Model.
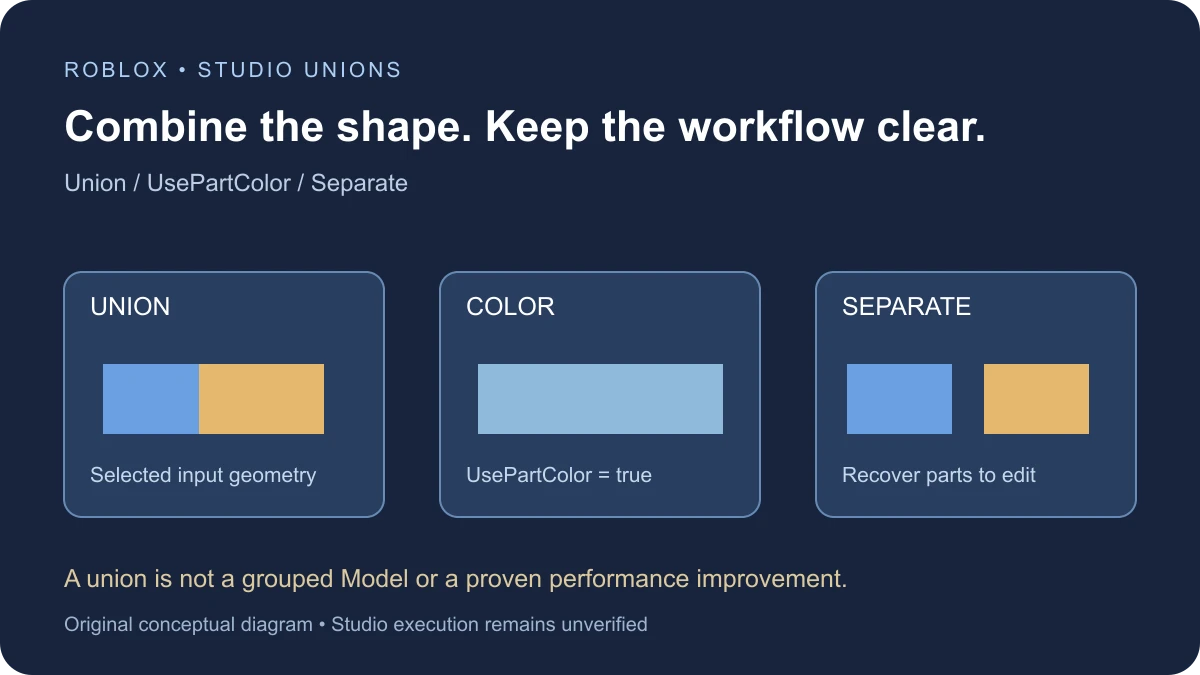
Union and Group solve different problems
A Model organizes related instances. A union performs a geometry operation that produces a solid-modeling result. If all you need is a tidy Explorer hierarchy or a handle for moving a collection, first consider whether a Model already solves that task.
Use a union when the combined shape is the objective. Keep an editable source copy while experimenting, especially before repeating operations across a finished map.
Make a first union with two simple parts
The official solid-modeling guide places Union, Intersect, Separate, and Negate in the Model tab. This first exercise uses ordinary block Parts, not imported meshes or runtime CSG.
- Open a spare place and insert two anchored block Parts.
- Give them different colors so you can recognize the inputs.
- Position them with a clear overlap and select both.
- Click Union in the Model tab.
- Inspect the result in Explorer and Properties, then compare it with the shape you intended.
For a concrete starting arrangement, make each block 4 × 2 × 2, with centers at 0, 4, 0 and 2, 4, 0. Their overlap is deliberate, so the expected outline is an extended block rather than two disconnected islands.
These are original proposed exercises reviewed against the documentation. They have not been executed in Studio for this guide. Verify the actual geometry, colors, and separation behavior in your own spare place.
How to color a union in Roblox Studio
The PartOperation reference explains UsePartColor. When false, a union keeps its original input colors. When true, its inherited Color or BrickColor controls the whole result.
- Select the UnionOperation.
- In Properties, enable UsePartColor.
- Set Color to the desired uniform color.
- Compare the result with UsePartColor disabled, using the same scene and lighting.
This gives you a useful diagnostic: changing Color while original face colors remain visible does not necessarily mean the color assignment failed. Inspect the override setting before rebuilding the object.
The workflow here is specifically for a PartOperation result. Current solid-modeling documentation distinguishes MeshPart color behavior from PartOperation behavior. If your tool or runtime API produced a MeshPart, inspect that class and workflow instead of expecting the same checkbox.
How to ungroup a union: use Separate
For a Studio union or intersection, Roblox documents Separate as the tool that restores the individual parts. Select the result and click Separate in the Model tab. This is different from ungrouping a Model container.
Practice the round trip before using it on a valuable build. Union the two colored blocks, inspect the combined result, separate it, then confirm the original pieces are available for editing. Keep a source copy if preserving every edit decision matters to your project.
If Separate is unavailable or does not produce what you expected, confirm the selected instance’s class and where it came from. An imported finished mesh is not automatically a reversible Studio union history.
Cut a simple doorway with Negate and Union
Negate marks an overlapping input for subtraction when you combine it with the positive shape. In a new spare exercise, make one wall and one oversized cutter, with both anchored.
| Input | Size X, Y, Z | Position X, Y, Z | Role |
|---|---|---|---|
| Wall | 8, 6, 2 | 0, 4, 0 | Positive geometry |
| Cutter | 3, 6, 4 | 0, 2, 0 | Negated subtraction input |
Select only the cutter and click Negate. Then select it together with the wall and click Union. The proposed cutter extends through the wall’s depth and below its bottom, leaving a doorway open at the base rather than a pocket inside the wall.
Analytically, the wall spans Y 1 through 7 and the cutter spans Y −1 through 5. Their overlap removes the center from Y 1 through 5, leaving a header above it. This describes the intended coordinates, not a measured CSG test result.
After checking the visible opening, run a separate character collision test if players must pass through it. A convincing silhouette is insufficient proof of the collision behavior you need.
Do unions improve Roblox performance?
A lower instance count is an observation, not proof of a faster scene. Evaluate the result’s geometry, collision, repeated use, and actual behavior on the devices your game supports.
Roblox’s performance guidance covers several rendering and scene costs. Use a controlled comparison: keep the camera path, object count, scene activity, and quality settings the same, then compare the original and union versions. Record the metric that was causing a problem instead of calling either version optimized based on its Explorer appearance.
For this beginner exercise, the goal is learning the shape-editing tools. Do not union an entire map as an unmeasured performance shortcut. A grouping decision, a geometry decision, and a measured performance change deserve separate checks.
Know the runtime and mesh boundaries
Current Roblox documentation also covers GeometryService operations and additional mesh solid-modeling capabilities, some behind the documented beta workflow. Those are a separate path from clicking Union on ordinary Parts in Studio.
If you need an imported mesh rather than a Studio union, use the mesh import guide. If you need to edit vertex data through code, use the EditableMesh guide. Choose the representation based on the task rather than converting everything into one type.
Debug one failed stage at a time
- The output shape is wrong: inspect the selected inputs and overlap before repeating the operation.
- The union will not recolor uniformly: check UsePartColor on the actual PartOperation.
- Ungroup does not recover the parts: distinguish a Model from a union and look for Separate.
- The hole is only a recess: inspect whether the cutter crosses the full depth.
- The player cannot pass through: test collision independently from the visible shape.
- The build feels slower: compare a controlled scene and identify the measured bottleneck.
Once the small examples behave as intended, apply the same workflow to one prop in your project. Keep the original source, verify the final shape and color, and test the object in the scene where it will actually be used.
Documentation reviewed November 17, 2026.