To add fog in Roblox Studio, first inspect Lighting for an Atmosphere object. For an atmospheric look, tune Atmosphere’s Density and Haze. For a simple distance-fog exercise without Atmosphere, use Lighting.FogStart, FogEnd, and FogColor. Roblox documents that the older fog properties are hidden when Lighting contains Atmosphere.
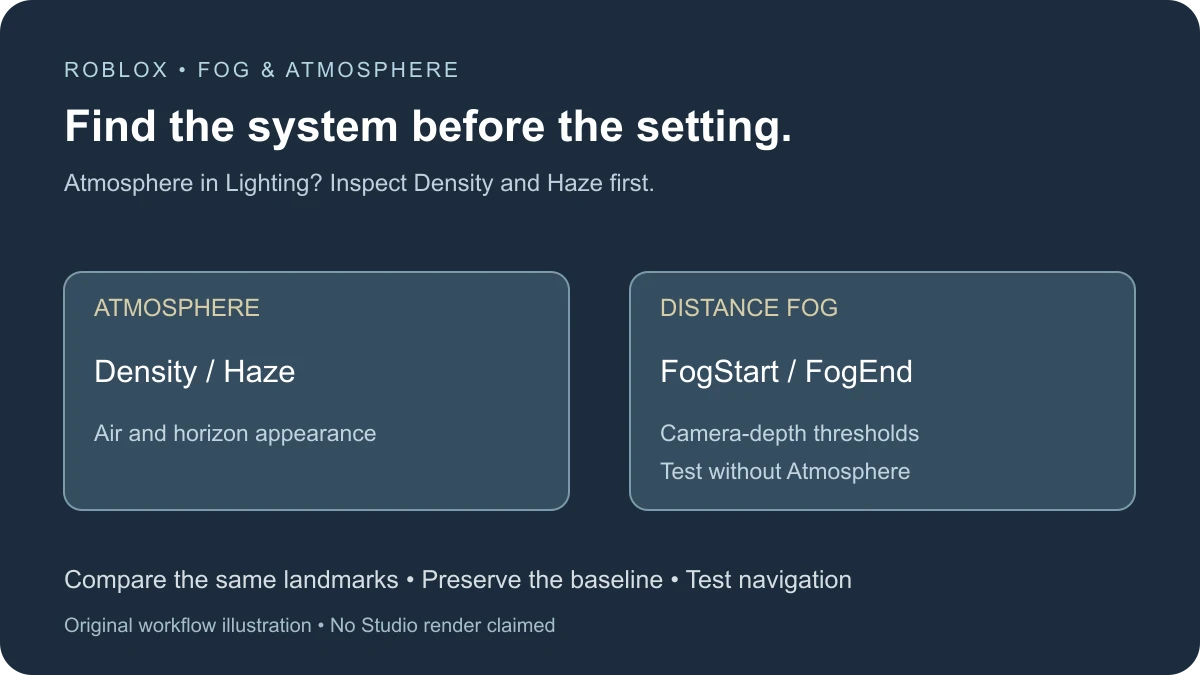
Identify the fog system before editing values
Select Lighting in Explorer and inspect its children. The Lighting API reference says FogColor, FogStart, and FogEnd are hidden when an Atmosphere object is present.
A missing FogEnd field is therefore a reason to inspect the hierarchy, not evidence that Studio is broken. Decide whether you are tuning the existing atmosphere or making a separate distance-fog test in a spare place.
Keep a copy of the scene and record the values you start with. Fog affects gameplay visibility, so preserve an easy route back before trying dramatic settings across a finished map.
Add an atmospheric fog effect
- Use an existing Atmosphere under Lighting if your scene already has one.
- For a spare scene without one, insert an Atmosphere under Lighting.
- Keep the camera and time of day fixed for the first comparison.
- Increase Density gradually and observe a nearby object, a middle-distance landmark, and the horizon.
- Adjust Haze separately, then compare the same view.
The atmospheric effects guide describes Density as the air-particle control that obscures objects and terrain. Haze changes the haziness above the horizon and into the distance. These controls work with the rest of the atmosphere; they are not start and end distances in studs.
For an original first experiment, compare Density 0 against 0.25, then compare Haze 0 against 1 while keeping the other recorded values fixed. These are proposed test values, not universal presets or measured results. This exercise has not been executed in Studio for this guide.
Use Color and Offset after the basic comparison
Once the density and haze are understandable, compare a neutral atmospheric Color with the palette you intend for the level. Keep the scene’s colored objects visible so you can judge whether important elements still stand out.
Roblox documents Offset as a control for light transmission between the camera and sky background. Increasing it favors a horizon silhouette, while reducing it blends distant objects toward the sky. The Atmosphere reference also warns about balancing it with Density to avoid unwanted distant-object artifacts.
If the sky seems visible through distant geometry, compare your Offset changes with the baseline. Do not try to solve that symptom by adding unrelated post-processing effects until you know which control introduced it.
Try simple distance fog in a separate scene
If you specifically want FogStart and FogEnd, use a spare place where Lighting does not contain Atmosphere. The documented values describe depth from Workspace.CurrentCamera: fog begins at FogStart and becomes fully opaque at FogEnd.
| Property | Test value | What to compare |
|---|---|---|
| FogStart | 30 | Where the first visible fog begins along the view |
| FogEnd | 120 | Where the distant scene becomes obscured |
| FogColor | 180, 190, 200 | How the fog hue fits the scene |
Place a few landmarks along the camera’s view direction and compare them from one fixed camera position. Record their placement and the camera frame. Character distance and camera depth are different measurements, especially in a third-person view.
Change FogEnd from 120 to 240 for a second pass while leaving FogStart and FogColor unchanged. You are comparing a wider transition range, not proving that every scene should use 240. Then restore the original values before trying another variable.
How to get rid of fog in Roblox Studio
First identify which workflow is present. In an Atmosphere scene, record the current Density and Haze, then compare both at zero. If you only want to determine whether Atmosphere is responsible, test its absence in a duplicate of the place and preserve the original for restoration.
In the distance-fog scene, record FogStart and FogEnd, then move the transition beyond the viewing range you are testing while keeping FogEnd greater than FogStart. This is a scene-specific way to move the effect out of your test view; it is not a universal “disable all visual haze” switch.
If the scene still appears hazy, inspect other effects and sources. A particle effect, an image overlay, or post-processing can resemble fog without being controlled by these properties. Compare one source at a time instead of deleting a group of environment objects.
Keep navigation readable
Use fog to shape the view, then test the actual route through the level. A cliff edge, jump target, doorway, and interactable object need to remain readable at the distances where players make decisions.
- Stand at the approach to a gameplay decision.
- Check whether the next safe destination is identifiable.
- Move the camera through the angles used during normal play.
- Repeat at the graphics settings and devices you intend to support.
- Record any place where atmosphere hides necessary information rather than optional scenery.
A decorative horizon can disappear earlier than a required platform. Treat those as separate design constraints. Do not judge the setup only from a still screenshot at the prettiest angle.
Debug a fog change that seems ineffective
- FogStart or FogEnd is missing: inspect Lighting for Atmosphere.
- You edited Atmosphere but see little change: compare the same camera view, landmarks, time, and other atmosphere values.
- A distance threshold seems wrong: compare camera depth, not only the character’s location.
- The settings revert: search for a weather or environment script changing them during play.
- Nearby objects become difficult to read: review density or transition placement before adding more light.
- Only distant objects look strange: inspect Offset and the scene’s distance-related rendering behavior separately.
For locating environment scripts, use Find All in Studio. For the underlying lighting target, compare the realistic lighting guide and retro lighting workflow. Settle the base scene before layering a weather effect over it.
Documentation reviewed November 17, 2026. No Studio scene was modified or rendered for this article.