Roblox raycasting asks whether a finite line segment meets an eligible surface. It is useful for a downward placement check, a line-of-sight probe, or selecting a surface. Start with a fixed origin and one target before adding camera input, player characters, or an entire map.
Give the ray an origin and a displacement
Use Workspace:Raycast(origin, direction, params). The second argument combines direction and length; it is not an absolute destination. Roblox’s raycasting guide explains this distinction and how to inspect the returned hit.
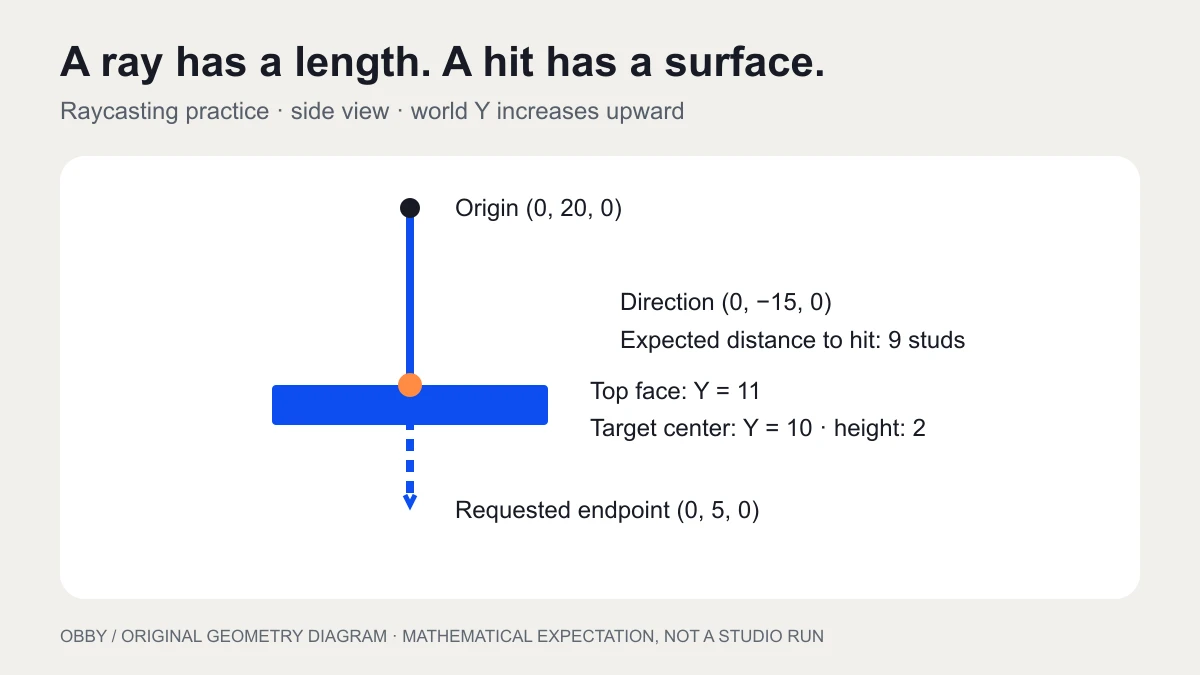
For example, an origin at (0, 20, 0) plus a direction of (0, -15, 0) ends at (0, 5, 0). If you already have a world-space destination, subtract the origin to obtain the displacement. Label both variables clearly so a destination is not accidentally passed as a direction.
A ray query does not create a visible laser. In the exercise below, the blue Part is the target and the orange sphere is a separate visual marker created only after a hit. The marker helps you inspect the result; it does not participate in deciding it.
Create one isolated raycast exercise
In a disposable practice place, insert a regular Script in ServerScriptService and paste this complete example. Open Output and run the place. The script creates a folder named RaycastPractice. Stop the test before rerunning; avoid leaving several copies of the same setup in an edited place.
local Workspace = game:GetService("Workspace")

local demo = Instance.new("Folder")
demo.Name = "RaycastPractice"
demo.Parent = Workspace

local target = Instance.new("Part")
target.Name = "Target"
target.Size = Vector3.new(8, 2, 8)
target.Position = Vector3.new(0, 10, 0)
target.Anchored = true
target.CanCollide = false
target.CanQuery = true
target.Color = Color3.fromRGB(13, 78, 241)
target.Parent = demo

local origin = Vector3.new(0, 20, 0)
local direction = Vector3.new(0, -15, 0)
local params = RaycastParams.new()
params.FilterType = Enum.RaycastFilterType.Include
params.FilterDescendantsInstances = {target}
params.RespectCanCollide = false
params.IgnoreWater = true

local result = Workspace:Raycast(origin, direction, params)
if result then
    print("Hit:", result.Instance:GetFullName())
    print("Position:", result.Position)
    print("Distance:", result.Distance)
    print("Normal:", result.Normal)

    local marker = Instance.new("Part")
    marker.Name = "HitMarker"
    marker.Shape = Enum.PartType.Ball
    marker.Size = Vector3.new(0.6, 0.6, 0.6)
    marker.Anchored = true
    marker.CanCollide = false
    marker.CanQuery = false
    marker.Color = Color3.fromRGB(255, 139, 67)
    marker.Position = result.Position
    marker.Parent = demo
else
    warn("No eligible surface within this segment")
end
The filter deliberately includes only the newly created target. Other scene objects cannot become the result of this particular query. The target is anchored, non-collidable, and queryable; RespectCanCollide is explicitly false. This separates a spatial query from a physical collision.
Compare the expected surface with the target center
The target is centered at Y = 10 and is two studs tall. Its upper face is therefore at Y = 11. Starting at Y = 20 and casting down 15 studs gives a mathematical expected hit position near (0, 11, 0), distance 9 studs, and upward face normal near (0, 1, 0).
The result should describe the surface, rather than the target’s center or the requested endpoint. Use that distinction when placing an object on a floor: the intersection gives you a surface location, but the object’s own size and pivot still affect where its center belongs.
| Practice change | Expected result to inspect |
|---|---|
| Keep the original setup | Top-face hit near Y 11, nine studs from the origin |
| Shorten direction to (0, -5, 0) | No hit; the segment ends at Y 15 |
| Move the origin to (20, 20, 0) | No hit; the ray is outside the target’s width |
| Set target.CanQuery to false | No eligible target in this include-only setup |
Reset to the original setup between changes. A failed prediction is useful evidence: inspect the actual inputs and query settings before adding another system. The code has been reviewed against current documentation but has not been executed here inside Studio.
Choose filters that match the question
The RaycastParams reference lists query settings. The FilterType and FilterDescendantsInstances pattern shown here follows the Creator Hub tutorial: Include restricts candidates to the supplied instances and their descendants; Exclude removes them from consideration.
For an isolated test, an include list makes the expected target unambiguous. For a world obstruction check, excluding your own character and visual helpers may fit better. An include-only target check cannot establish that the whole path is unobstructed: a wall outside the list is deliberately ignored.
Before changing a filter, write the question in plain language. “Does this segment intersect my selected platform?” differs from “What is the first obstacle between these two points?” Reusing the first filter for the second question can make an obstructed route appear clear.
Check query settings before blaming transparency
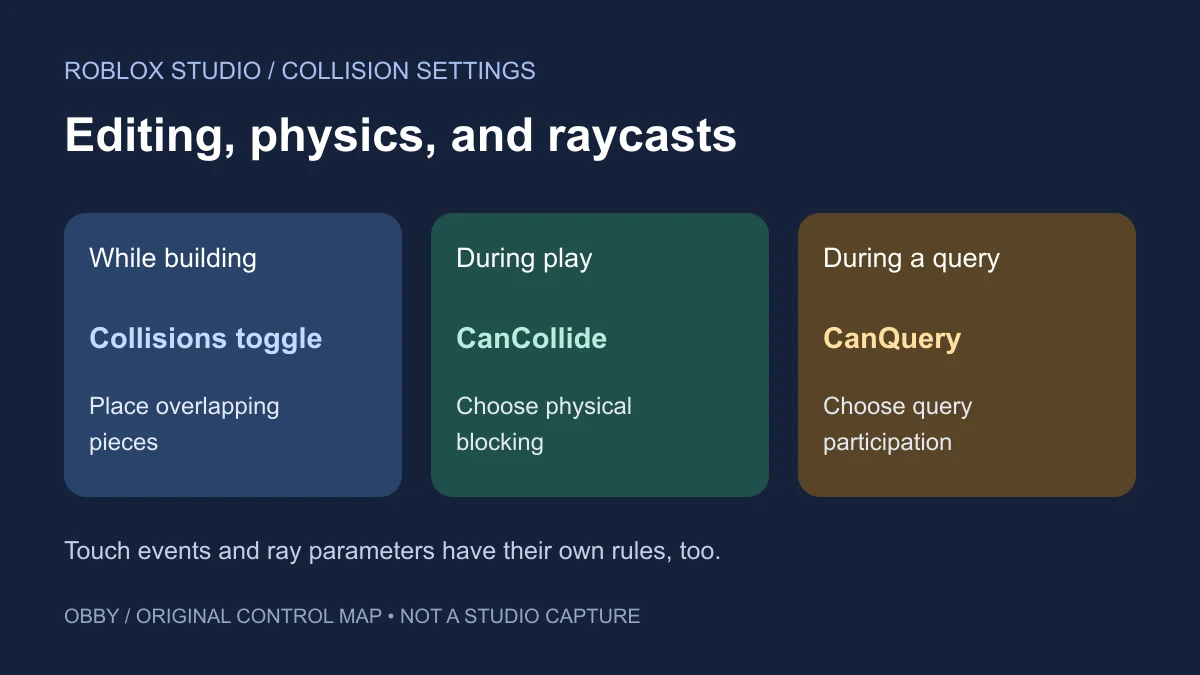
The BasePart documentation distinguishes CanQuery from collision and appearance settings. This example disables physical collision on both Parts, keeps the target queryable, and makes the marker non-queryable. Transparency alone is not the query policy.
If your production query behaves differently, inspect its collision group and RespectCanCollide setting as well as each candidate’s query properties. Keep the diagnostic scene simple enough that you can explain every candidate. Avoid changing collision behavior across a real map merely to make one query succeed.
For physical category rules and the current Workspace APIs, use the collision groups guide. Keep its player collision test separate from this fixed-target ray query.
Handle a missing result before reading its fields
The WorldRoot API defines Raycast as returning a RaycastResult or nil. Keep result.Instance, Position, Distance, and Normal access inside the successful-result branch. A missing hit is a valid query outcome, not necessarily a broken script.
For a nil result, print the origin and displacement, check the segment’s length, then check the filter. In a client-side test, consider whether streaming has made the relevant geometry available. Do not turn “my client did not detect it” into a guarantee that nothing exists there.
Connect raycasting to the next system carefully
For local versus world-space offsets, use the CFrame coordinate guide. For a character that needs a route around obstacles, continue with Roblox pathfinding; one clear ray does not compute a walking route or prove that a character can fit through it.
A placement feature also needs rules for allowed surfaces, object bounds, ownership, and server validation. Start with one small scene from the obby prototype briefs, then add those decisions explicitly. This diagnostic script is a learning exercise, not a complete building system or an authoritative multiplayer hit system. Documentation checked November 8, 2026.