Make a Roblox animation by posing a rig at different times in Studio’s Animation Editor, previewing the movement between those poses, and publishing the finished clip when you need an animation asset ID. For your first attempt, build a short greeting rather than a full walk cycle.
Start with a rig and one small action
Roblox’s editor animates rigs: connected body sections whose joints can be posed. Insert a pre-built rig with Studio’s Rig Generator, then open the Animation Editor from the Avatar tab or Window → Avatar menu. Select your rig and name the clip. Interface labels can vary across Studio layouts; the current Animation Editor reference is the source for the editor workflow.
Choose a rig type deliberately and record it in your project notes. This exercise is a greeting made on that rig; it does not establish that the animation fits every avatar. Keep one rig in the practice scene so you can immediately recognize the intended target.
Plan five poses before adding detail
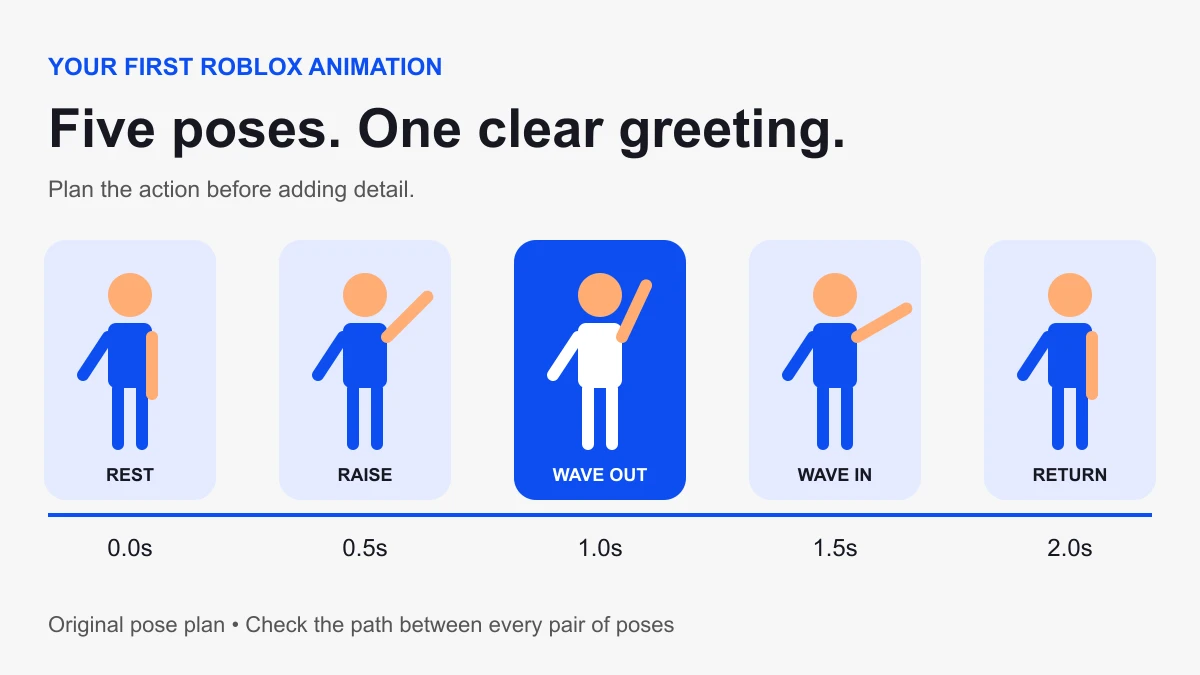
The following timing is an original practice brief, not a required Roblox preset. Aim for a two-second action that is readable from the front. Write the pose names on paper or keep this table beside Studio.
| Time | Pose | Check |
|---|---|---|
| 0.0s | Rest | Clear starting silhouette |
| 0.5s | Raise hand | Elbow stays clear of torso |
| 1.0s | Wave outward | Hand motion is easy to see |
| 1.5s | Wave inward | Motion reverses without a sharp snap |
| 2.0s | Return to rest | Ending feels settled |
Create the key poses on the timeline
Place the timeline position at the first time and pose the body sections you intend to animate. Move to the next time and create the next pose. The editor interpolates between poses using its easing settings. Follow the official posing lesson if you need help selecting and rotating a body section.
Work with the arm first. Leave the head and torso quiet until the arm reads well. Adding motion to every body part makes it harder to locate the cause of an awkward moment. After the greeting works, add a small head turn as a separate revision and compare it to the simpler version.
Scrub between each pair of poses instead of looking only at the endpoints. A good pose at 0.5 seconds can still produce an awkward path on the way there. Check whether the hand travels through the torso, whether the elbow folds unexpectedly, and whether a shoulder motion creates an unintended shrug.
Adjust timing before adding more keyframes
If the wave feels slow, shorten the spacing around the wave poses. If the return feels abrupt, give that section more time or reduce the distance it travels. Change one variable, replay the clip, and note the result. Avoid adding several intermediate poses simply to hide a timing problem.
Compare three passes: normal playback for the overall feeling, slow playback for the movement path, and manual scrubbing for a specific joint. View the rig from the side as well as the front. A motion that looks tidy from one camera can reveal a hand clipping through the body from another.
Decide whether the clip should loop
A greeting can be a one-shot action. Do not make it loop merely because continuous playback is convenient while editing. If you choose a repeating motion, inspect the transition from the last pose to the first as carefully as any other transition. For the exercise, use the same resting pose at the beginning and end, then check whether the replay still has an unwanted pause.
Save the work, then publish for an asset ID
Editor Save preserves animation work in the place; publishing creates the asset you reference for playback. In the editor’s ⋯ menu, choose Publish to Roblox and complete the asset fields. For a group-owned experience, select the group in the Creator field. Keep the asset ID with your notes. Roblox’s character animation tutorial explains the publish workflow.
Keep an editable project copy as well as the published ID. Name revisions descriptively, such as GreetingArm_v2, and record what changed: “slower return” is more useful than “fixed.” Our Studio saving guide covers project backups.
Check playback in the actual experience
For a concrete NPC playback example, use our AnimationTrack loading and troubleshooting guide.
An editor preview is one stage of validation. Test the published clip on the intended rig in the experience. Record the asset owner, target rig, playback trigger, and expected ending. If the preview works but runtime playback fails, investigate that setup rather than rebuilding every pose immediately.
- Confirm the asset ID belongs to the animation you just published.
- Check the target rig and its joint structure.
- Inspect Output for loading errors.
- Check which other animation tracks are running.
- Test the action twice, then test after respawning if it is a player action.
This article covers authoring a first clip. Loading tracks through code is a separate implementation step; begin with our scripting tutorial if you need to learn Script placement and events. Publishing a clip for an experience also differs from selling a Marketplace animation pack. Sources checked October 6, 2026.