Building Games Are One of Roblox's Most Popular Genres
Building games consistently rank among the most-played experiences on Roblox. Games like Bloxburg, Build A Boat, and Theme Park Tycoon prove that players love creating things. If you want to make a building game in Roblox, you're tapping into a genre with massive demand.
This guide walks you through creating a building game from scratch — from the core plot system to building tools and saving player builds.
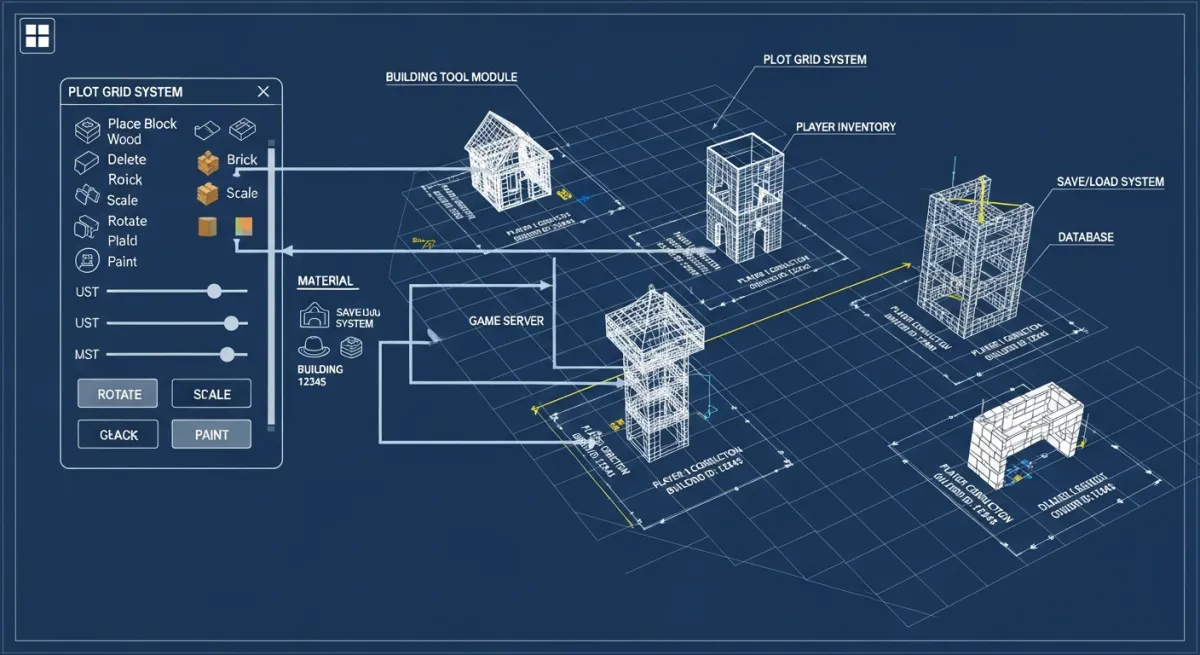
Core Components of a Roblox Building Game
Every building game needs these systems:
- Plot system — assign each player their own building area
- Building tools — let players place, move, rotate, and delete objects
- Item catalog — a selection of parts, furniture, or blocks players can use
- Save system — persist player builds between sessions
- Economy (optional) — earn currency to unlock more building items
Step 1: Set Up Player Plots
Create a plot template in Roblox Studio — a flat baseplate with boundaries. When a player joins, clone the template and position it in the world. Here's a simplified approach:
local plotTemplate = game.ServerStorage.PlotTemplate
local plots = {}
local nextPosition = Vector3.new(0, 0, 0)
local SPACING = 100
game.Players.PlayerAdded:Connect(function(player)
local plot = plotTemplate:Clone()
plot.Position = nextPosition
plot.Parent = workspace.Plots
plots[player.UserId] = plot
nextPosition = nextPosition + Vector3.new(SPACING, 0, 0)
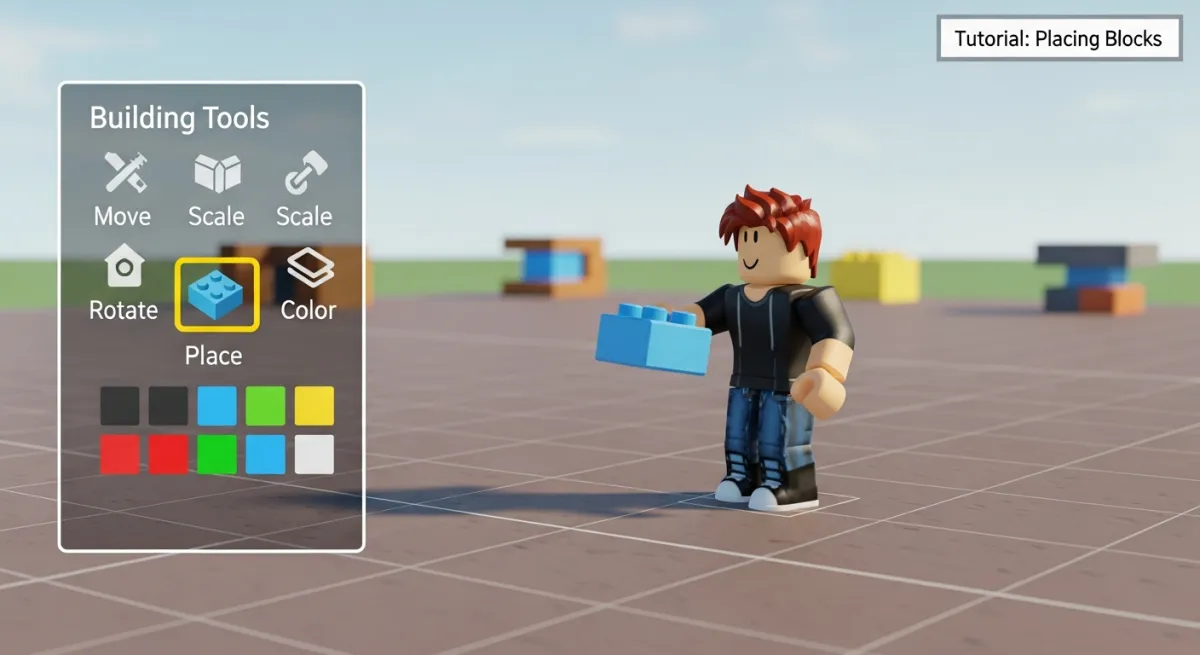
end)Step 2: Create Building Tools
Players need to place objects on their plot. The basic flow: select an item from a catalog, click on the plot to place it, and optionally rotate or move it. This requires:
- A UI catalog showing available items
- Mouse raycasting to determine where the player clicks
- Server validation to ensure items are placed within the player's plot
- Grid snapping for clean, aligned builds
The mouse raycasting and placement logic runs on a LocalScript, but the actual object creation must happen on the server for security.
Step 3: Build the Item Catalog
Create your building items as Models in ServerStorage. Each model should have:
- A PrimaryPart for positioning
- A name and category (e.g., "Walls", "Furniture", "Decorations")
- A cost if you're using an economy system
- A thumbnail image for the UI catalog
Step 4: Add a Save System
Use Roblox DataStoreService to save what each player has built. When a player leaves, serialize their plot's objects (type, position, rotation) into a table and save it. When they rejoin, load and reconstruct their build.
local DataStoreService = game:GetService("DataStoreService")
local buildStore = DataStoreService:GetDataStore("PlayerBuilds")

-- Save on leave
game.Players.PlayerRemoving:Connect(function(player)
  local plot = plots[player.UserId]
  if not plot then return end
  local data = {}
  for _, obj in ipairs(plot:GetChildren()) do
    if obj:IsA("Model") then
      table.insert(data, {
        name = obj.Name,
        cf = {obj.PrimaryPart.CFrame:GetComponents()}
      })
    end
  end
  buildStore:SetAsync(tostring(player.UserId), data)
end)
Step 5: Add Polish
- Undo/redo — track placement history so players can reverse mistakes
- Color and material options — let players customize placed objects
- Visit mode — let players tour other players' builds
- Permissions — allow friends to build together on one plot
The Fast Track: AI-Generated Building Games
Building all these systems from scratch takes significant Luau knowledge and time. If you want a working building game quickly, Obby can generate one from a text description. Describe your building game — plot system, items, economy — and get a playable .rbxlx file in minutes.
Try Obby free and make your building game today.


